Out of all the satellite internet service providers, Starlink is the easiest to set up.
This article discusses Starlinks installation cost, winter operation, weatherproofing, grounding, power consumption, and other essential things.
On the surface level, these topics may seem trivial, but they are crucial when you dive deeper.
For example, even though Starlink is the best internet for RVers, they can’t keep the Starlink on for 24 hours a day due to power consumption.
Let’s discuss each of these topics.
Does Starlink Dish Need to be Grounded?
For many home electronics devices, grounding may not be necessary. But the Starlink dish should be grounded. Otherwise, you could face a huge problem.
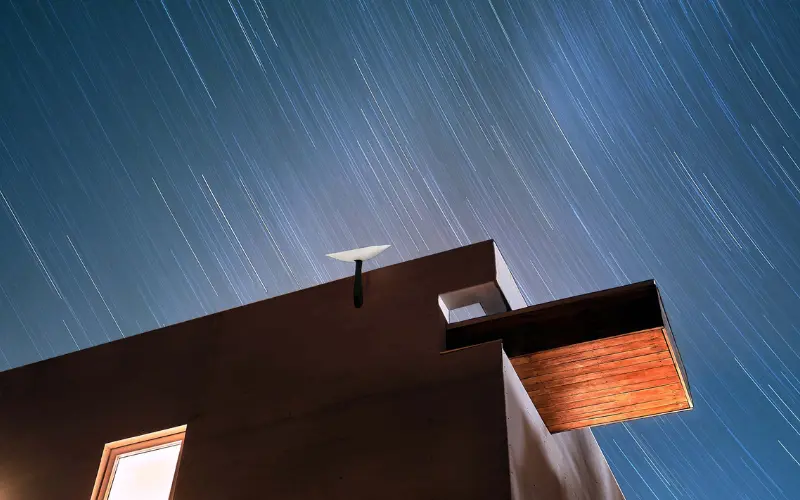
To get Starlink internet, we need to place the Dish where it has a clear view of the sky. For this reason, many people install their Dish on top of the roof or side of their house. Sometimes people also install the Dish on top of trees to get the best Starlink service.
Even if you place your Dish on an open lawn, it also will be higher than the surroundings.
Therefore, if lightning strikes in the vicinity of your house during a storm, the probability of hitting your Starlink dish is very high. If the Dish is on the rooftop, lighting will certainly strike it unless you have a lighting rod beside your Starlink dish.
Therefore, grounding the Starlink dish is very important to protect your home electronics and power lines.
SpaceX mentions that they have designed the Starlink with NEC (U.S. National Electrical Code) grounding guidelines.
However, SpaceX states, “any user who lives in an area with lightning should have the appropriate lightning protection installed per your local electrical code before using Starlink.”
The Starlink antenna uses PoE (Power Over Ethernet) cable. The cable that goes to the antenna carries data and power. Therefore, you should connect the router to a grounded outlet.
Moreover, we also have to remember that even if there’s no lighting, the Dish will gather electrostatic charges from dust and wind over time. If it’s not discharged safely, it can damage the Starlink antenna.
If you want to be on the absolutely safe side, running a grounding cable from the Starlink dishes metal base to the earth is better.
Related: Can You Paint the Starlink Dish and Bury the Cable? — 6 Things You Should Know.
Does the Starlink Dish Melt Snow?
SpaceX is making the Starlink for every region in the world and for every climate zone. It works from the California desert to the Minnesota cold weather.
Starlink dishes and routers can withstand extreme heat and cold without any performance degradation.
The Starlink dish has a built-in heater, water repellent coating, GPS, and other sensors. Rainwater simply slides off the antenna.
Moreover, the Starlink dish can detect snow and will enable the heater to melt it. A user doesn’t have to do anything to remove snow. It’s all automatic.
Therefore, even if you live in an extremely cold region where you get a lot of snow, you can use the Starlink internet without any issue. In fact, when the Starlink service first came into existence, SpaceX shipped all the terminals to cold region customers first.
However, if you live in an area where you get a lot of snow, you must be careful about a few things.
Don’t mount the Starlink dish only a few feet off the ground. Because on snowy days, the Dish will melt snow and drip water. Eventually, this water will create a freezing waterfall effect where the water refreezes from the ground to the top.
The following image illustrates the situation.
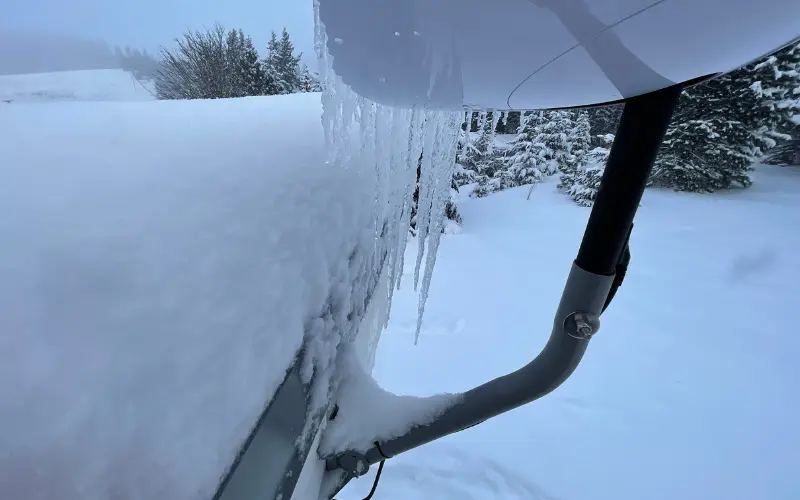
In the image, you can see that the Starlink dish has melted snow. But the water created icicles that were stuck on the Dish. It’s a common occurrence.
Now, if the Dish is mounted near a structure, the icicle will join the Starlink dish with another structure, preventing the antenna’s movement.
Starlink dishes move autonomously to get the best satellite signal. If your Dish is stuck, the internal motor will overheat and get damaged.
Therefore, always put your Dish high enough from the ground or any structure so that icicles can’t prevent Starlink’s movement.
Related: 10 Things You Should Know About Starlink Dish and Router.
Is the Starlink Router Weatherproof?
The first generation Starlink router wasn’t waterproof. Therefore those can’t be used outside. However, SpaceX has stopped making those routers.
Currently, every Starlink router has an IP54 rating and is weatherproof. Therefore, these are waterproof and dust resistant. The router can be placed and used outdoors. It can withstand rain, snow, hail, sleet, and dust.
However, for the longevity of the router, it’s better to place the router under a roof to protect it from rain, snow, and sun. You can also place your router in a weatherproof box. Remember that the Starlink router becomes hot while operating. Therefore, a bottom ventilated box is better.
The Starlink dish is also weatherproof and has an IP54 rating.
How Much Does it Cost to Install Starlink?
SpaceX will send you a DIY (Do It Yourself) kit when you purchase the Starlink. If you install it by yourself, it would cost $0.
However, if you need to install the Starlink dish on the rooftop or side of your house, you need to hire a professional. It will cost, on average, $180 to $250. The cost could rise to $600 depending on areas, the height of your house roof, and the technician’s availability.
Starlink dishes don’t need to be on the rooftop, though. Any clear area will do the job.
Therefore, if you have a lawn, you can mount your Starlink on a pole as long as there’s no obstruction by trees, mountains, or a house.
Can I Install Starlink Myself?
SpaceX’s Starlink has the world’s most user-friendly, easy setup method. You don’t need to hire a professional installer. You can install your Starlink by yourself within 15 minutes. The entire process is simply a plug-and-play method.
There are several satellite internet companies in the world. The majors there are HughesNet, Viasat, and Starlink. Amazon is also currently working on its satellite internet project named Kuiper.
The HughesNet and Viasat are very hard to set up and need a professional installer. Their antenna needs to be placed at a specific angle towards the sky because they use a handful of satellites.
On the contrary, Starlink uses tens of thousands of low earth orbit satellites. At each time, several satellites are above our sky. Moreover, the Starlink dish has a built-in motor that can change the angle of the Dish.
The Starlink dish moves automatically to get the best satellite signals. You don’t have to do anything. It will move and rotate to provide the best internet speed.
Therefore, the Starlink dish doesn’t need to be level. You can install the Starlink dish at up to 40 degrees off-angle, and still, it will work perfectly.
The entire installation process is straightforward. Here is the self-installation process:
- Find a place where you can see a clear sky view.
- Place your Starlink dish with the metal base with the flat surface facing upward.
- Connect the ethernet cable from your router to the Dish.
- Connect power to your router.
- Wait a few minutes. You will get the internet.
Therefore, anyone can install Starlink.
However, as we mentioned earlier, you need a clear sky view. If you live in an area with lots of trees and there’s no clear area to place your Starlink dish, you may need to install the Dish on your house roof. In this scenario, you may need to hire a professional to do it for you because going on the rooftop isn’t safe for most people.
Does Starlink Dish Require Power?
Starlink dish is an active phased array antenna. All the electronics related to signal transmission and reception are within the Dish. Therefore, it requires constant power.
Starlink has started shipping second-generation dishes. The first generation was round, but the second generation antennas are rectangular.
The router that Starlink ships acts as a WiFi router and Modem. It also supplies power to the Starlink dish.
The original Dish, which is round, draws a lot of power. On a typical day with no rain and snow, it draws 120W on average consistently. However, Starlink will activate the snow melt feature if there’s snow, and the power draw shoots up to 180W. During rain, the power draw hovers around 150W.
The new Starlink dish, which is rectangular, draws significantly less power. Typically it uses 40W under normal environmental conditions. During rain, the antenna’s power consumption rises to 50W on average. If there’s snow, the rectangular Dish will activate its heater and draw up to 90W power.
Therefore, before you order Starlink, please keep these numbers in mind.
If you are planning to use the Starlink dish on your RV or Boat, you can’t keep the Starlink on all day. If you do, it will deplete your vehicle’s battery.
Related: Can You Sell Starlink Dish? 5 Things About Starlink Moving, Transferring, and Service Cancellation.