Every Starlink kit that SpaceX ships comes with a phased array antenna and a WiFi router. You don’t have to purchase a router separately.
However, this isn’t only a WiFi router. It combines a router and modem and provides power to the Starlink dish.
Starlink Router is Weatherproof
The second-generation Starlink router that is being shipped with the rectangular dish has an IP54 rating. Therefore, these are water-resistant and dustproof. It has the same rating as the Starlink dish.
Thus, the Starlink router can be used outdoors without any problem. Rain, snow, hail, or sleet will not damage it.
However, if you want to place your Starlink router outside your house permanently, it is better to put it in a safe location away from rain or snow. The primary reason is that it will make your router last longer. We will suggest you put it inside a plastic box.
Starlink routers can stay outside, but it’s better to take some precautions. The router is IP54 rated, not IP67. Therefore, this is water-resistant, not waterproof. Your router will get damaged if it gets submerged in water due to a flood or other reasons.
Does Starlink Router Have Ethernet Ports?
The first generation Starlink router shipped with the round dish had dedicated ethernet ports.
However, the second-generation Starlink router that ships with the rectangular dish does not have a built-in ethernet port. SpaceX has removed it.
They removed it to make the router design leaner. Another reason for removing the ethernet port is that SpaceX wanted to make the router waterproof for outdoor use.
Over the years, SpaceX found commercial customers such as the US military, Airforce, and coast guard who are actively using Starlink internet. Moreover, Starlink also provides internet in disaster situations.
In these cases, the Starlink router must be used outdoors. To make it water-resistant, they removed the ethernet port.
However, There’s an easy, low-cost solution to add ethernet ports to the WiFi router, which we discussed later in the article.
In the first generation Starlink antenna, most satellite signal processing happens at the dish. But the main drawback is that it consumes a lot of power, typically 140W on average.
SpaceX has moved a lot of processing hardware into the router to make the second-generation dish more power-efficient. Moreover, the power adapter is now integrated into the router, which provides power to the antenna.
Previously, the first generation Starlink kit had three parts.
- Starlink dish
- Power adapter / modem
- Router
The latest Starlink kit has only two parts.
- Rectangular dish
- Router/Modem/Power Adapter combo
Thus, SpaceX has removed the ethernet ports from the router.
Can Governments ban, block, censor, or jam your Starlink internet access? How will China and Russia tackle Starlink? To learn more read this article.
Here’s How to Add an Ethernet Port
There’s an easy way you can add an ethernet port to your Starlink router.
Starlink sells a WiFi ethernet adapter on their website. You can order it online. However, due to heavy demand, it’s already back-ordered.
Please, don’t buy those Starlink ethernet adapters from eBay. eBay scalpers will ask you a lot of money.
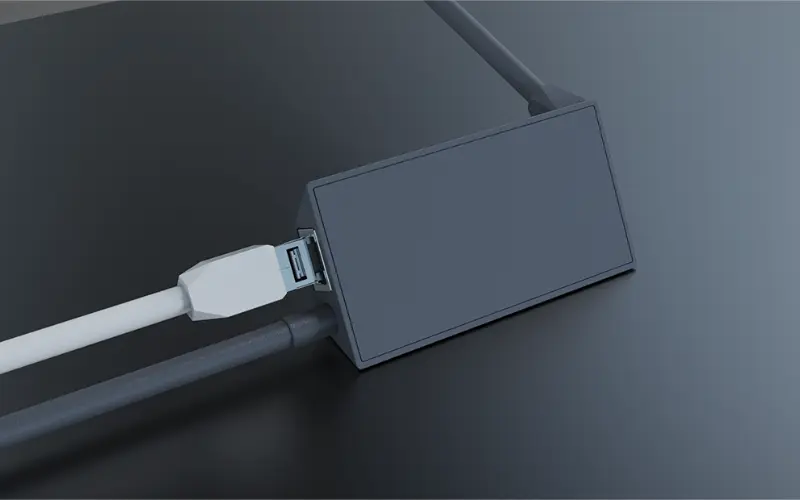
Instead, buying a WiFi to Ethernet adapter from Amazon would be best. It does the same thing with the same performance but costs less. Here’s an example of the WiFi to ethernet adapter from Amazon.
This adapter works in the following way:
- The adapter connects to your Starlink WiFi.
- It has an ethernet port. Once you connect this adapter to your home WiFi, it will convert the internet from wireless to wired internet.
- Now, connect any of your wired devices that need internet with the ethernet port, for example, TV, Laptop, or home wired network.
Starlink Installation and Maintenance (6 Important Things) — https://provscons.com/starlink-installation-and-maintenance/
How to Update Starlink Router?
You can’t manually update the Starlink router. However, you can initiate the process to force the router to update itself. For this, you have to reboot the router.
You can initiate the Starlink router update in several ways:
- Turn off your Starlink router by removing the power cable. Wait a few minutes, then plug your router power cable again.
- Or, in new Starlink apps, click on the Settings (gear icon), and click on “Reboot” under “WiFi Actions.”
- Or, (older app) go to support, click on Advanced. There are several options there. Click on the “Reboot WiFi.”
- Or, if your computer is connected to Starlink internet, go to http://192.168.100.1/, and click on “Support.” Then go to Advanced and click on “Reboot WiFi.”
Please remember that your Starlink router may not start downloading the update right away. Sometimes, it takes several hours to complete the entire process.
If your router doesn’t receive an update, simply leave it powered on with the Starlink internet-connected. It will update itself automatically within a few hours.
Starlink doesn’t work in every weather condition. In this article, you learn how snow, rain, clouds, and storms affect Starlink internet.
What’s the Range on a Starlink Router?
The Starlink router has dual-band channels — 2.4GHz and 5GHz.
The 2.4GHz travels further but provides slower internet, and the 5GHz provides speed up to 1Gbps but travels a shorter distance. In contrast, the internet speed on the 2.4GHz will fluctuate between 20Mbps to 30 Mbps.
The range of the Starlink router depends on where you placed the router. On average, the router has an effective range of 200 feet. However, trees, branches, walls, and bricks will deteriorate the WiFi range and speed.
Please don’t place the router in the basement or the garage because it will lower your internet speed.
Connect to the 2.4GHz network if you want to use it from afar. The internet speed will be slower, but you will get a connection. Inside your home, connect to the 5GHz network for better speed.
Red/White Light on the Starlink Router
If your router lights are blinking red or white, this section discusses the meaning of those lights.
If you got the circular dish, the lights are in front of the router. The meanings of the lights are as follows —
No Light: If there’s no light, power is disconnected from the router. Check your cable whether it is properly connected.
Red Light: Starlink is not connected; there’s no internet.
Flashing White Light: Starlink dish is searching for satellites. The dish will search for an internet connection for 30 minutes. If it fails, the light will turn from blinking white to solid red. The flashing white light also means your Starlink dish is updating its firmware.
Solid White Light: You have a good internet connection. Check the Starlink app if you want to know about service outages.
For the rectangular Starlink dish, the router lights are at the bottom.
No light: It means the router doesn’t have power. It’s offline.
Solid white light: It means the router has power. Unlike the first generation, you have to use the Starlink app to diagnose and check for your Starlink internet quality.
Many HOA will ask you to paint the Starlink Dish. In some areas, you must bury the cable to protect it from animal bites or lawn mowers. This article discusses 6 important things about the Starlink dish, router, and cable.
How to fix “Starlink unable to load router configuration.”
It is a common issue. Don’t freak out. The fix is straightforward.
The following steps will fix your “Starlink unable to load router configuration” issue:
Process 1:
- Click on the Support/Advanced button in your Starlink app.
- Then Logout from your account.
- Close app.
- Reopen the app and log back in. Re-login should fix the issue.
However, if Process 1 doesn’t work, the second process will definitely work.
Process 2:
- Turn off power from your Starlink router and the dish.
- Wait 10 minutes.
- In the meantime, uninstall the Starlink app.
- Reinstall the app from the app store.
- After 10 minutes, turn on your Starlink router and dish, and open the Starlink app. The issue should be fixed by now.
If you still face a problem, immediately contact Starlink support.